Here are the steps to install the pegboard. Follow the guide!
All pegboard mounting hardware is included. With your Aire pegboard, you receive:
- 4 to 8 screws (depending on the size of your panel)
- same amount of dowels
- same quantity of washers
- 0 to 30 adhesive spacers
- 1 Torx key
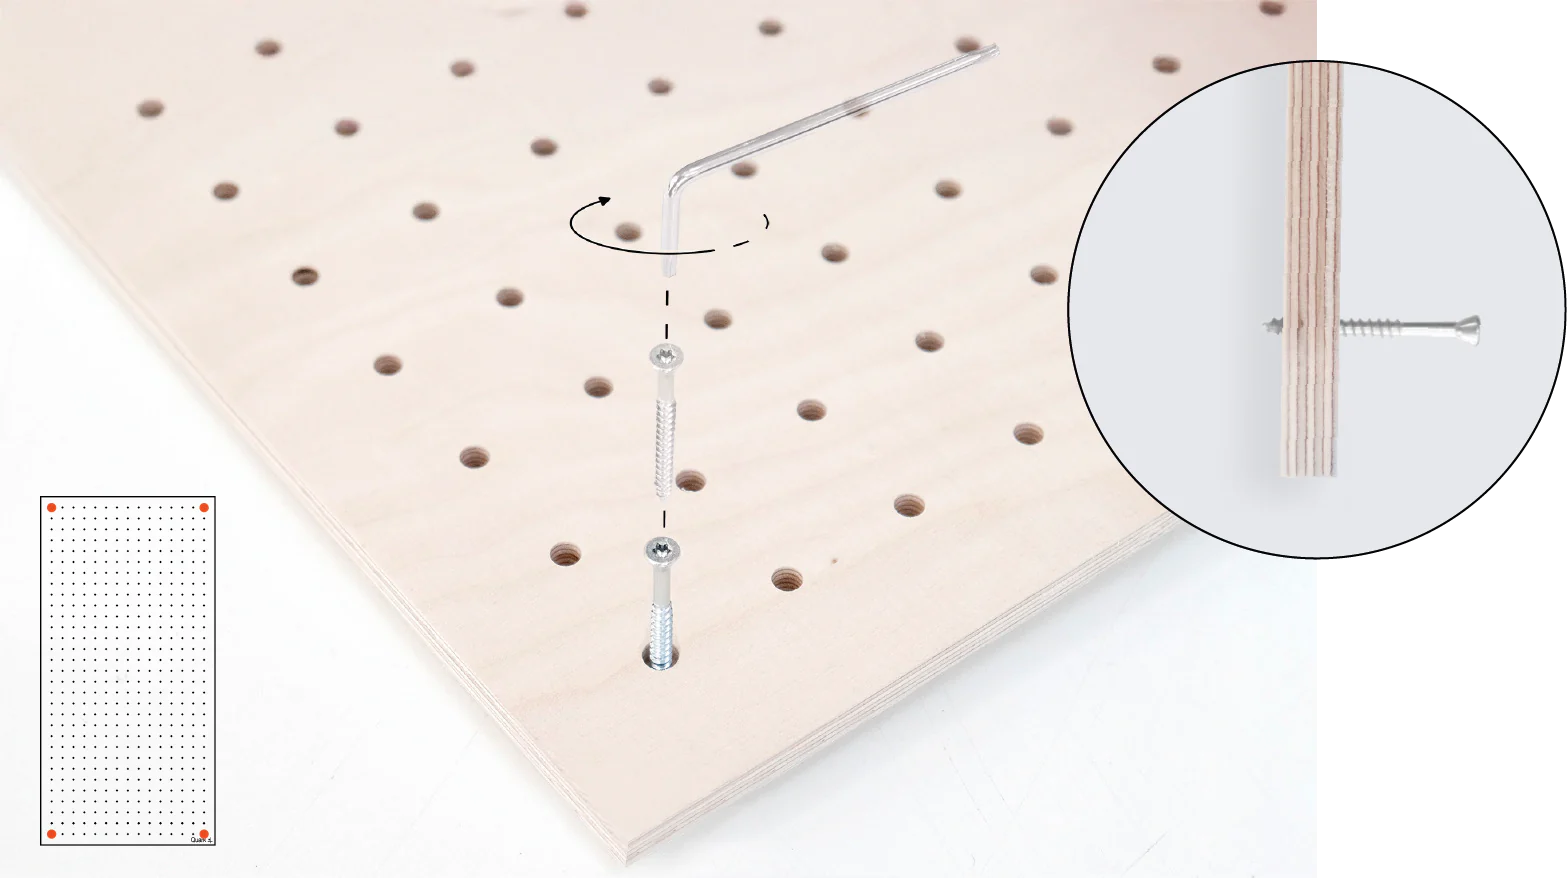
1.
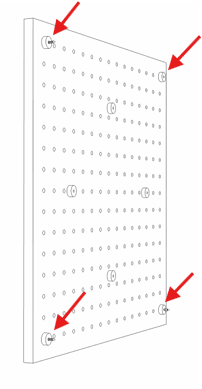
Prepare the screws
Lightly screw the 4 (or more) screws into the special holes of the Pegboard with the provided Torx10 key.
Leave 5 mm protruding.
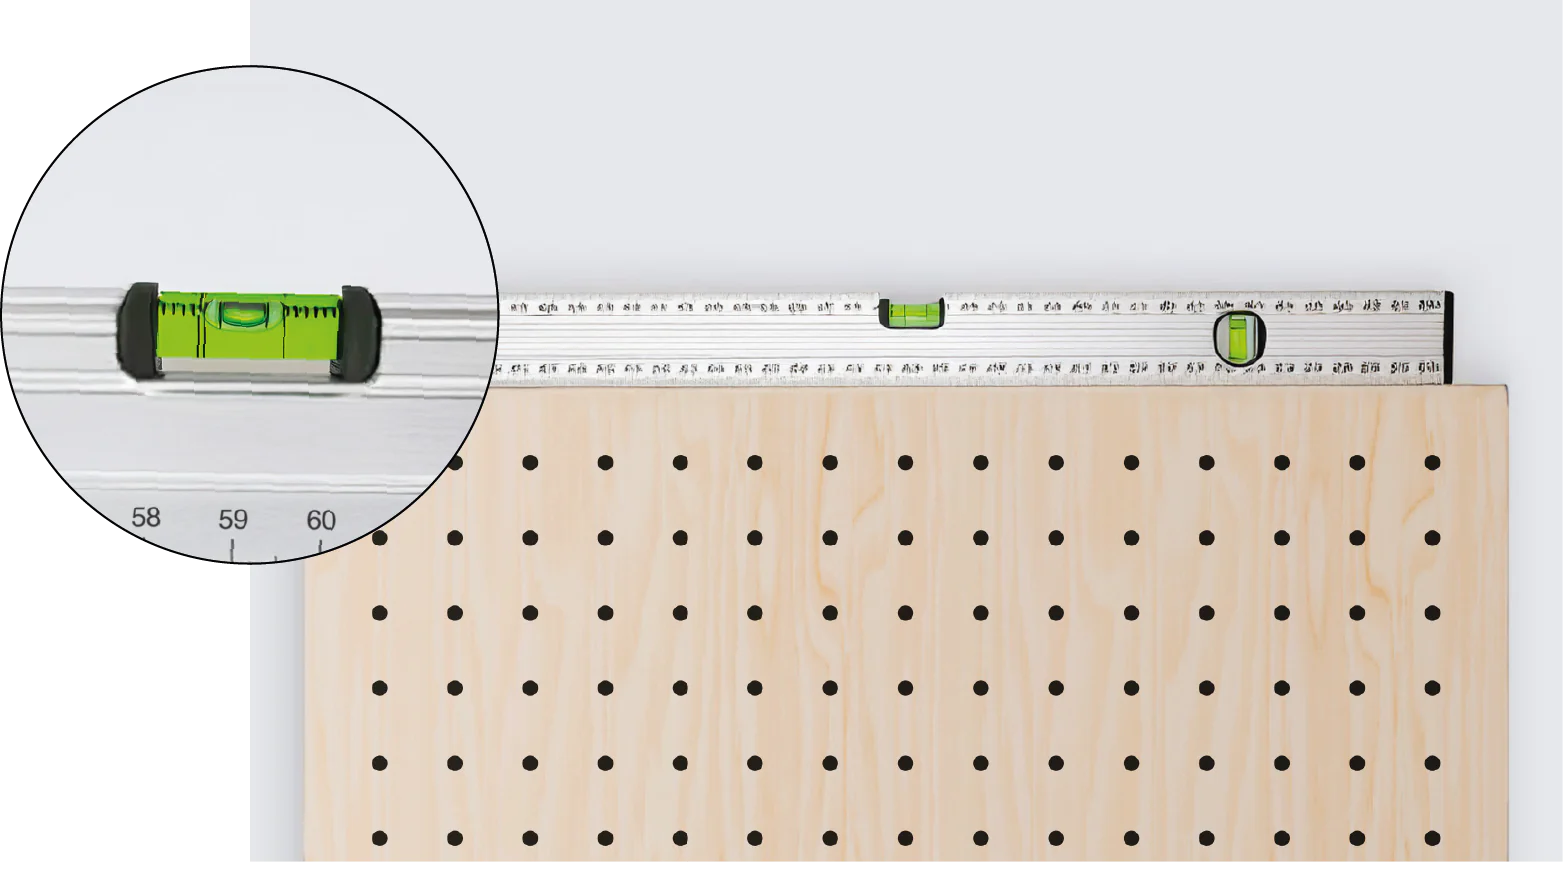
2.
Position the Pegboard
Place it on the wall in the desired location.
Use a level to align it horizontally or vertically.
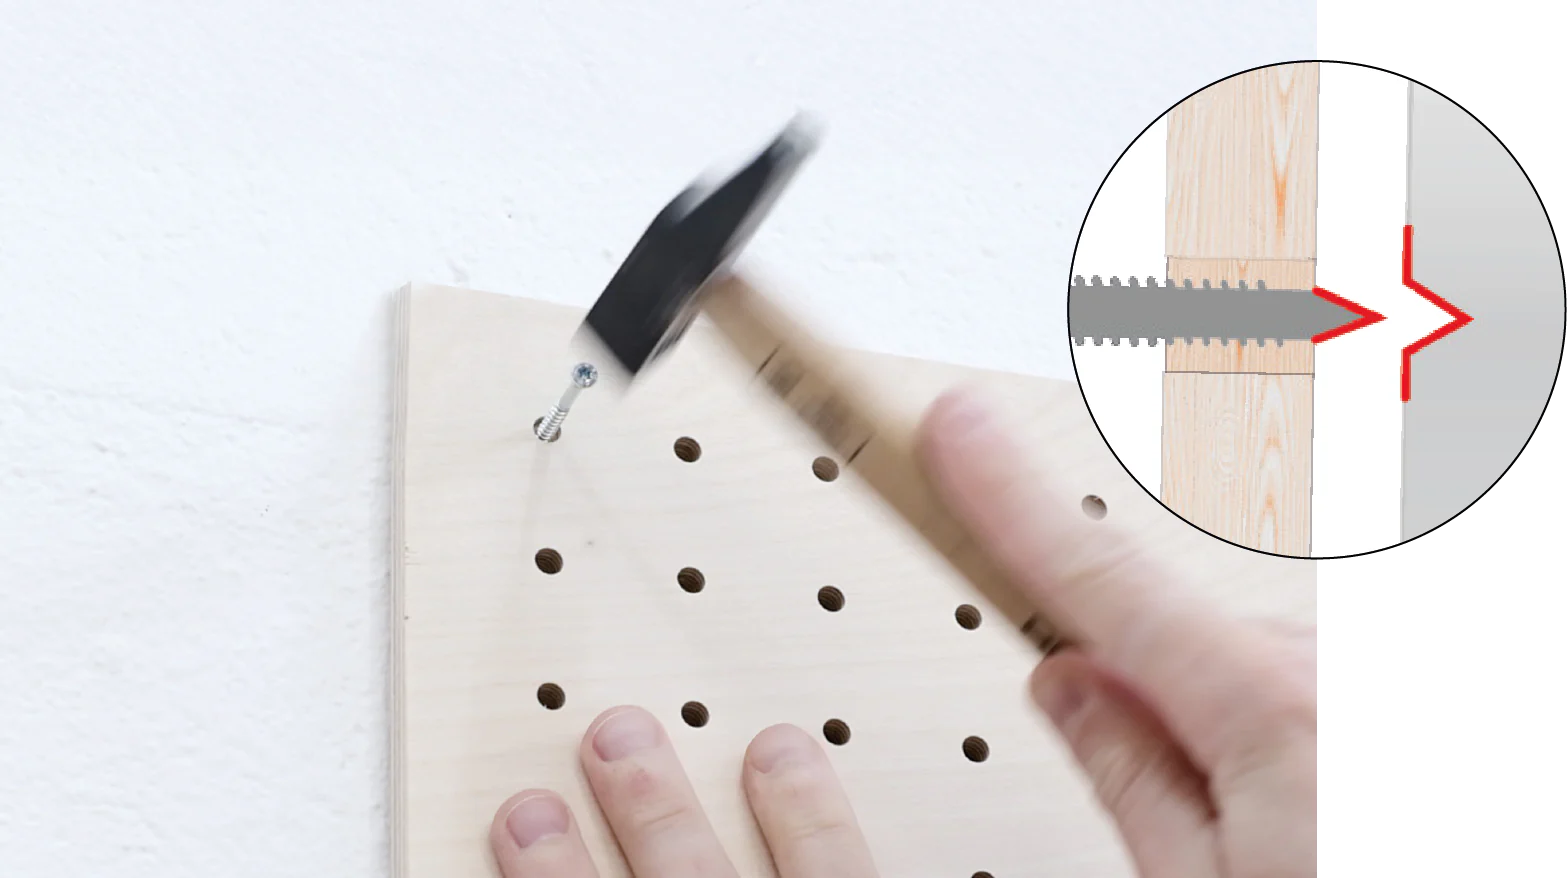
3.
Mark the wall
Hold the pegboard in place and lightly tap the screw heads to mark the drilling points.
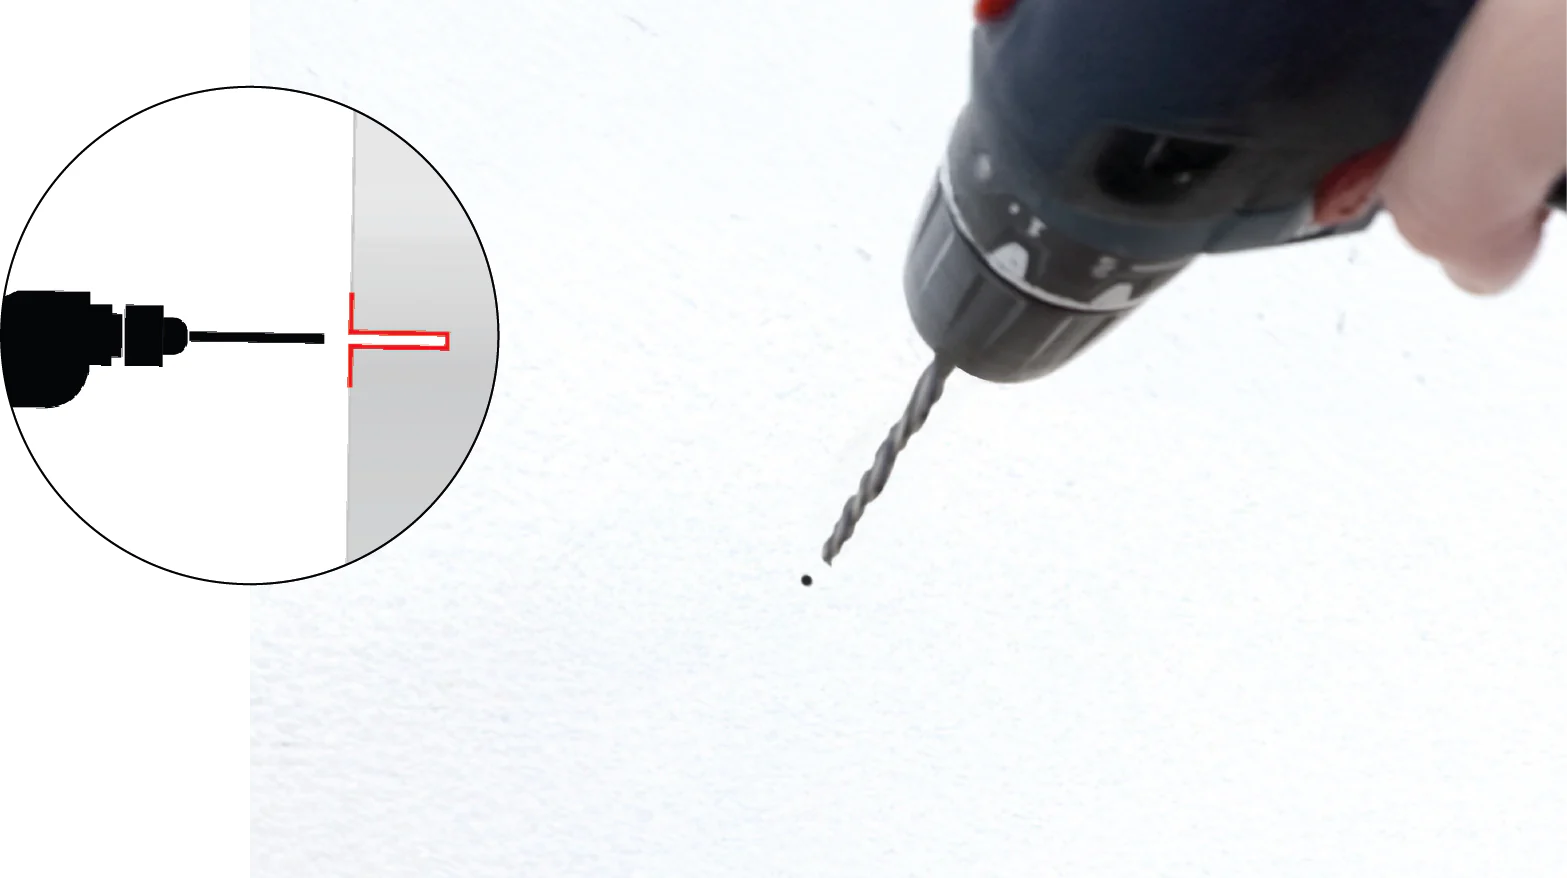
4.
Drill the holes
Remove the Pegboard.
Drill the marks with a 6 mm drill bit.
5.
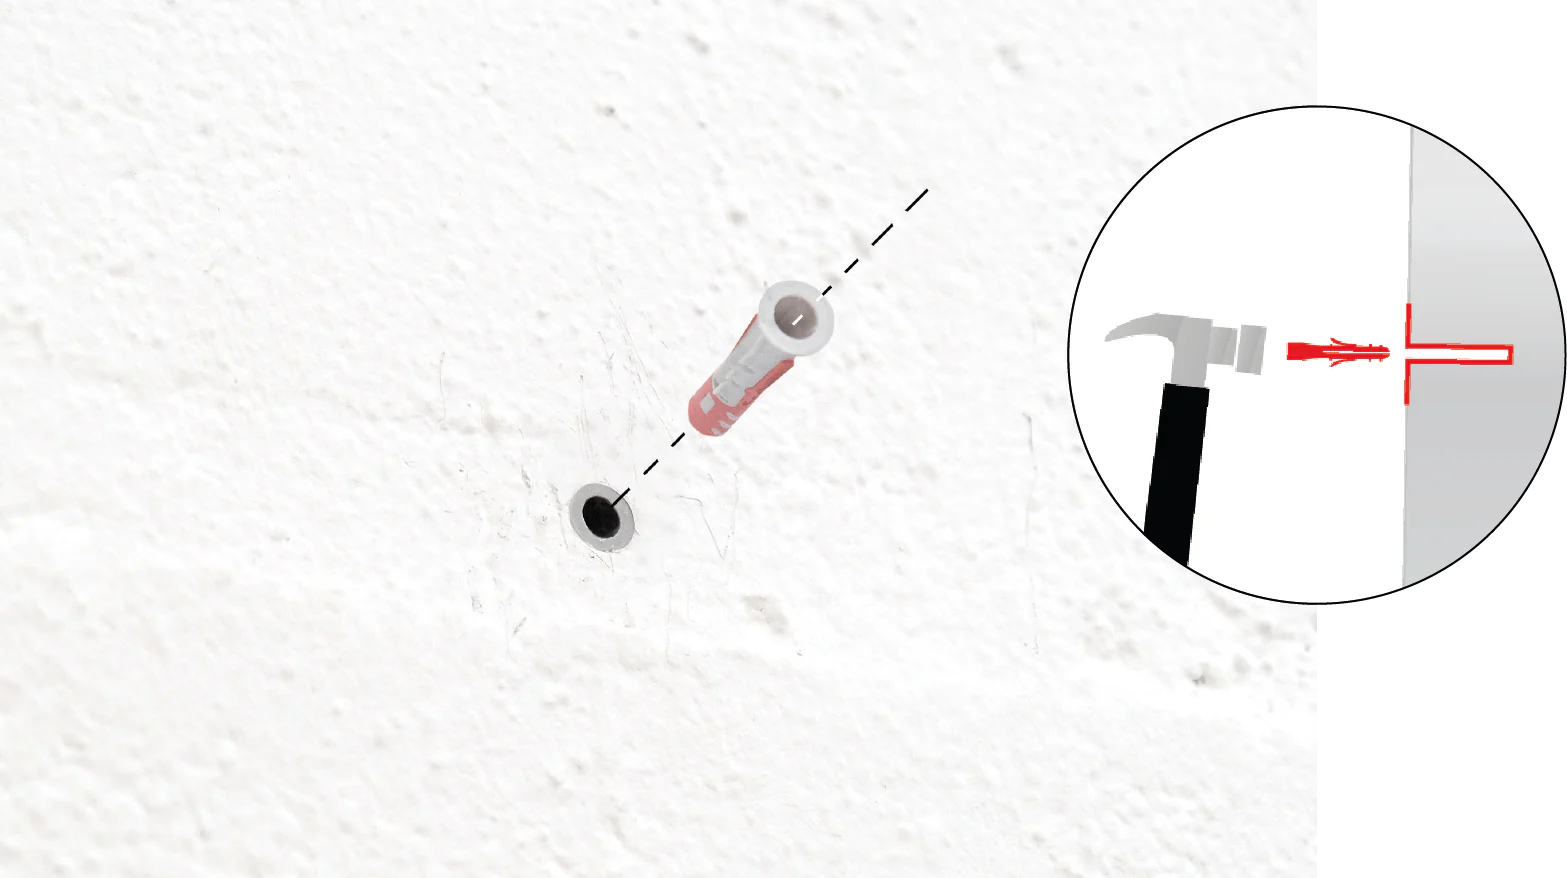
Insert the dowels
Hammer the nylon anchors into the holes.
6.
Position the washers around the screws
Place the adhesive-free washers around the pegboard screws. These pieces ensure the correct distance between the wall and the board.
7.
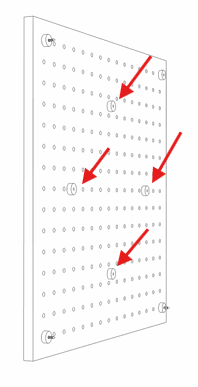
Glue the adhesive spacers
Attach the adhesive washers to the back of the pegboard, evenly distributed over the entire surface, without obstructing the holes. These pieces ensure the correct distance between the wall and the panel.
8.
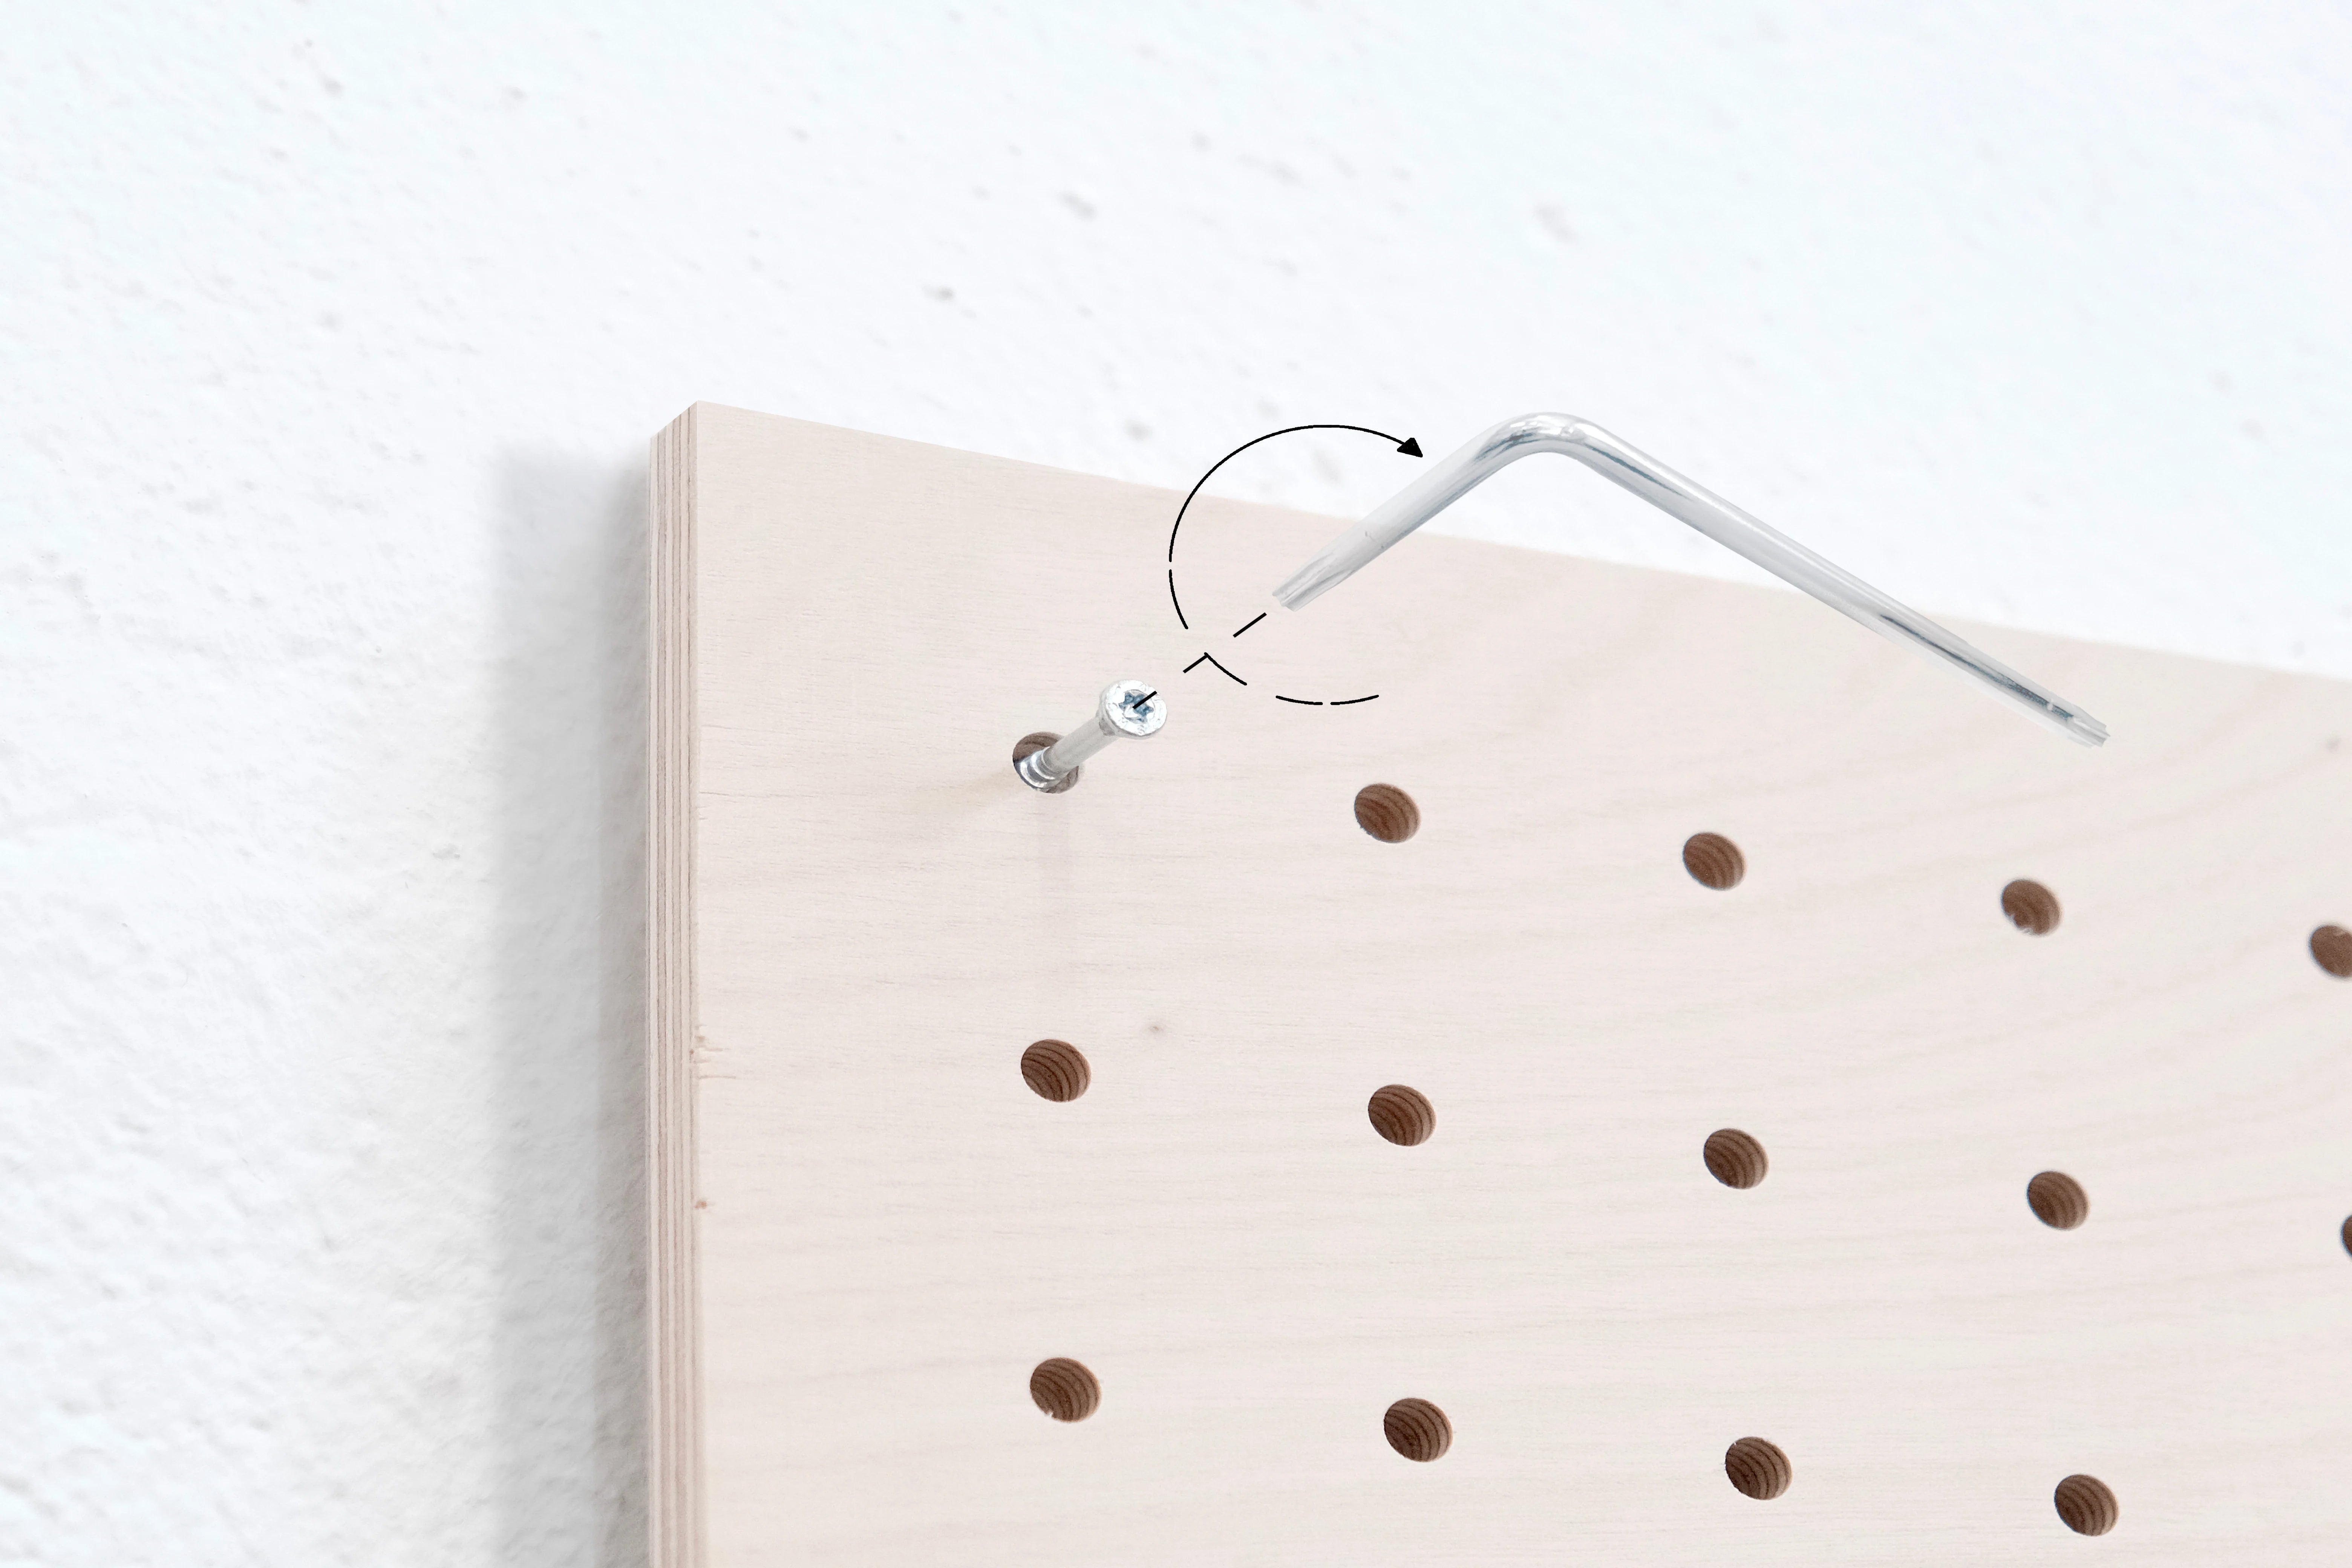
Fix the Pegboard
Align the Pegboard with the pegs and screw until it contacts the spacers.
No need to overtighten: the fit is guaranteed.